Get Your iPhone Notifications Under Control with iOS 9

If you are using iOS 9 you will be happy to know that you can now, finally get your notifications under control.
Step 1: Turn Most Notifications Off
Let’s face it every app wants to notify you about something, but unless you love your day being constantly interrupted, don’t let them!
- Go to “Settings”
- Select “Notifications”
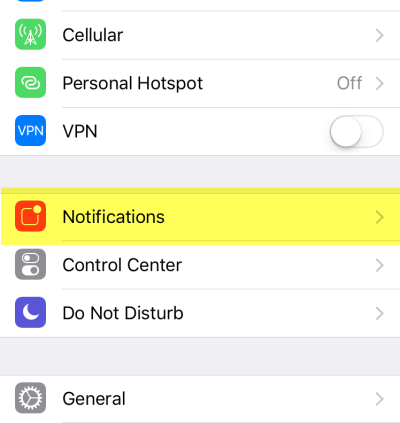
- Set almost everything: games, news readers, utilities to, “off”
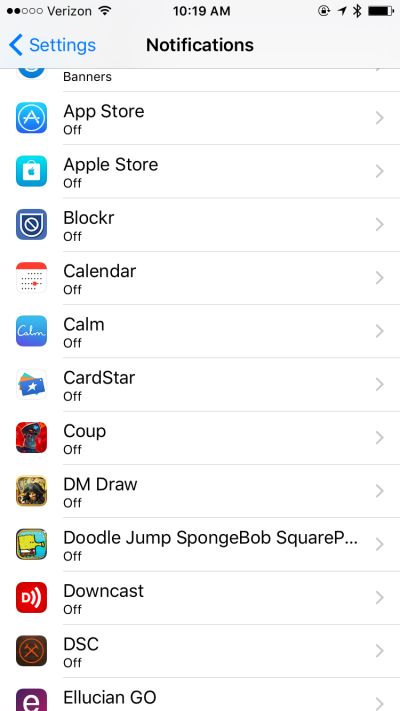
Step 2: Anything You Still Want, Set to “Banners”
Some stuff you might want. Your favorite game, your kids school app, Facebook.
- Turn off Sounds, Badge App Icons (those little numbers) and Show on Lock Screen.
- For Alert Style, select “Banners”

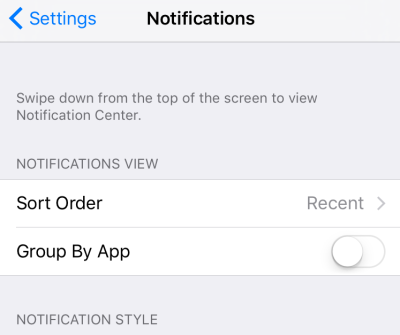
Step 3: Group Notifications By Day
Finally, make them manageable by grouping by day.
- Back under “Settings” –> “Notifications” set your Sort Order to “recent” and turn off “Group By App”
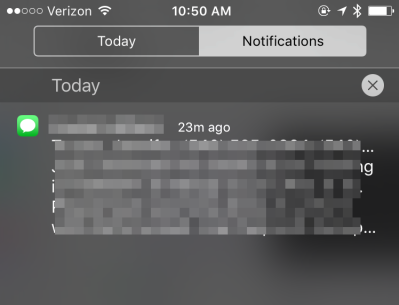
Step 4: Bliss
Now you aren’t getting bugged all day, your phone is quiet most of the time. And you can slide from the top to see all your notifications, by day, and get rid of them for each day by clicking the “X” (clear) button.
Final Note
Don’t let new apps take over, the first time you run an app, and it asks if it can notify you, say “NO” – you can always go back in a give it more if you want.

